(8/10/01): There aren't many 'gauge mount' solutions for a
'74 superbeetle... I decided that I would probably have to make one
myself. After a couple days of drawing up the schematics on a CAD program,
I decided how I wanted to make it -- I ended up Vacuum Forming it! I have
never done this before, but in the end, it turned out rather well! I
wanted to mount 4 gauges (cylinder head temp, Oil temp, Oil pressure, and Volt)
on the DASH (where I could see it easily without having to 'take my eyes off the
road' too much). I wanted ALL of the gauges to be pointed directly at
me.
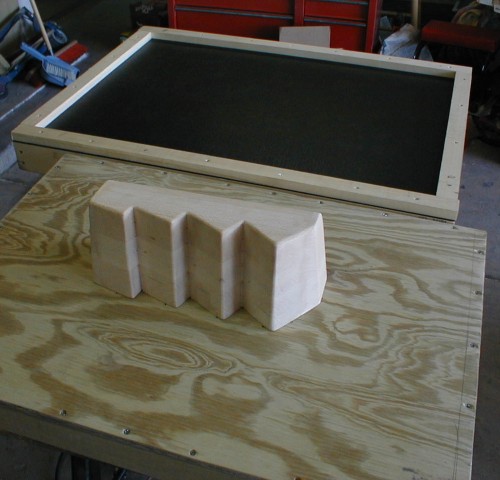
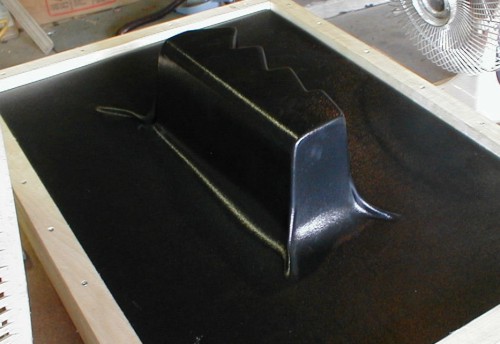
I started off by making a BALSA model of what I wanted (using my cad drawing
exclusively). In the first picture you can see the model mounted to a base
(a large SEALED box). Vacuum actually plugs in underneath the whole base
unit. I then drilled small holes in the base, around the edges of the
model. In the background of the first pic, you can see the sheet of
plastic that I will be using to vacuum form this. (found it cheap at a local
vacuum forming place). Its mounted inside of a frame that slips perfectly
over the base (the piece the model is mounted to). The idea is to heat of
the frame with the plastic in it, turn on the vacuums (I used 2 in series), and
slip the whole frame over the base for an airtight fit, and wait for the suction
to create the form. All the sides of the model had to have a 5 deg. angle,
so that once the plastic was hardened over it, it would (hopefully) slide off
easily.
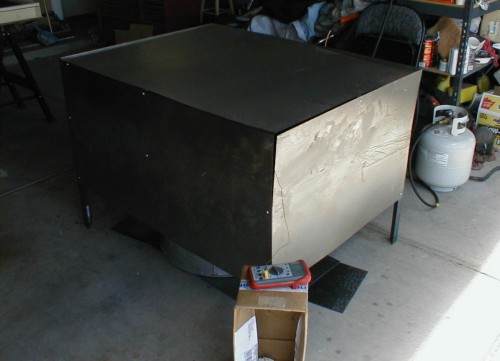
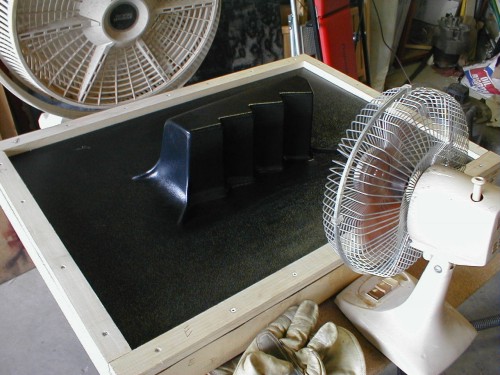
In order to heat up this big sheet of plastic, I needed to make a large
oven. As you can see below its just a simple box made out of angle iron,
and sheetmetal. To heat it, I used one of those double burner propane
garage heaters. I just set it underneath the oven with both burners on.
In this pic, the temp was only up to 285 deg. F. I found you need to
bring the plastic up to 350 deg. F. for around 1-2 minutes (it will give off a
puffy blue smoke). To get the temps up that high, I just put an old
blanket over the top of the oven (the edges of the oven weren't sealed as you
can see in pic). With the blanket on top, I could successfully bring the
temp. to over 360 deg. F. if I wanted! - not too bad for a homemade oven!
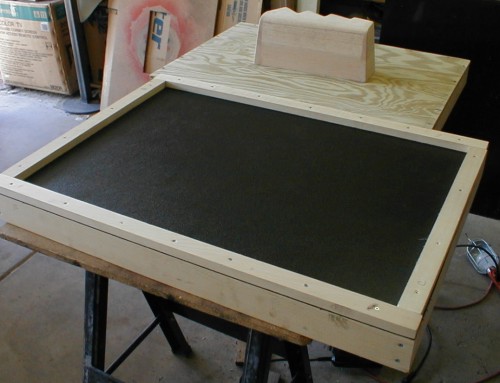
Once I got it heated up to the correct temperature, I slid it over the model
(with the help of a friend), and held down on it for a little while (with the
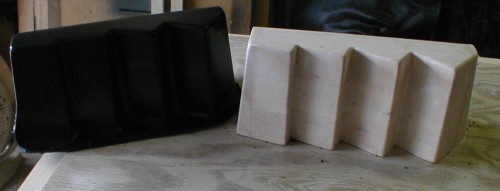
vacuum on full blast). I made the model a LOT taller than what I needed,
because I knew that the lower portion would need to be trimmed because of
wrinkles, etc...
Luckily before we put the plastic on the model, we spread some talcum powder
all over the model. This helped ENORMOUSLY when removing the form.
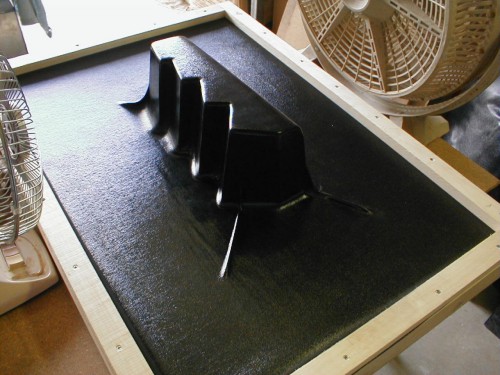
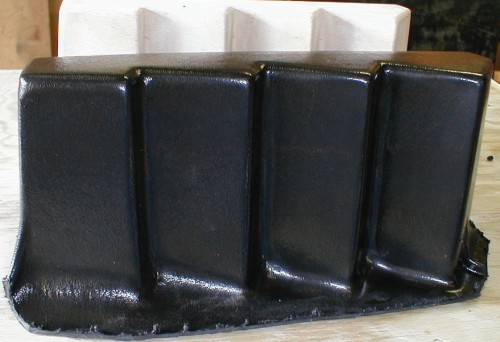
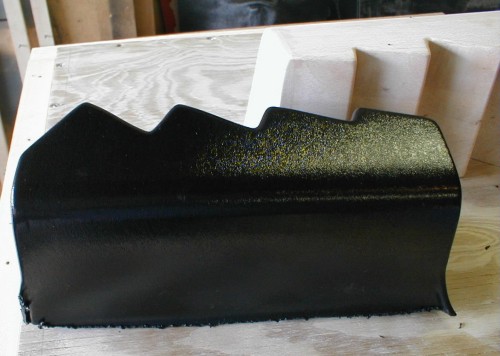
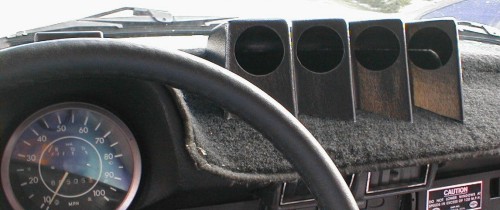
Once I got the base trimmed how I wanted it, I test fitted it on my
dash. Looks pretty good huh?
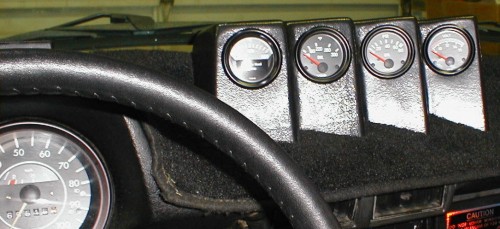
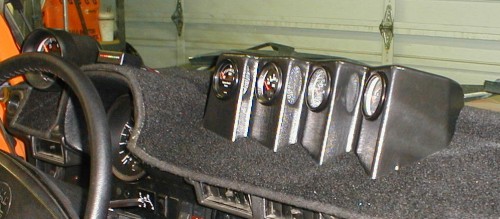
Then I installed the gauges, and wired them up! (from L to R: Cylinder head
temp, oil temp, oil pressure, and volt)
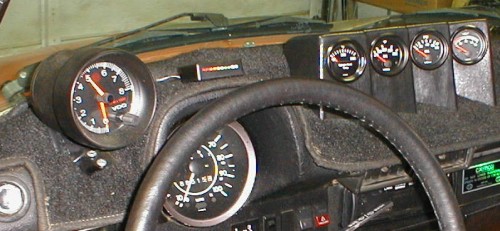
This picture shows how the back end of the gauge cluster kind of goes up over
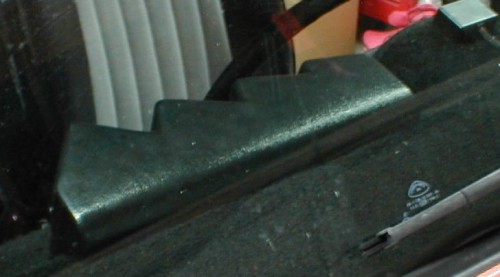
the 'hump' in the dash.
Through the front windshield
That's all there was to making a custom gauge pod for my dash... It
turned out really well. I haven't even attached it yet - So far it has
stayed in place! Unfortunately, the plastic is NOT UV resistant.
Lucky for me, I kept everything, so even if I have to remake one every year, it
wont be a big deal.
![]()
![]()
![]()

![]()

![]()
![]()
![]()
![]()
![]()
![]()
![]()
![]()
![]()
![]()