Eric's ECP 4100 CRT Projector
Scroll to the bottom of the page for my most CURRENT HT setup (with my new ECP4500+ projector, and Momitsu!
![]()
Scroll to the bottom of the page for my most CURRENT HT setup (with my new ECP4500+ projector, and Momitsu!
![]()
(3/29/03) - While browsing
web-pages of others' "home theaters" I've been drooling over their CRT
projectors. I told myself to 'dream on', since there is no way I could
afford a new one. But lo and behold - I managed to find one locally!
Sure the projector needs some work, but that's all part of the fun right?
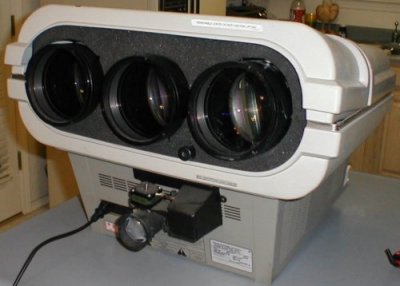
A deal was made, and below is a pic of my new purchase (an Electrohome 4100 CRT projector w/ACON)
loaded up in my bug (tight fit!), on its way
"home."

![]()
Initial impressions: WOW this thing is heavy! :-) An understatement is that this unit will be OVERKILL for my apartment, but that's the type of person I am. Bigger is better! I think it will be AWESOME, once fully fixed & setup correctly.
What's missing/damaged: No manuals, No remote, No cords, No tools, no rubber feet, Missing rear metal panel (see pic below), and some scratches on the outer lens. Exterior casing beat up a bit, but insides are fine. ACON not fully functioning correctly. Composite video input not working (I think the multi decoder card is shot).
Surprises: This unit has ACON (automatic convergence system). Not 100% working... yet. Don't really need it, but its there. The lens seems to get 'stuck' sometimes during the learn screen sequence.
The goods: I OWN A CRT PROJECTOR WOHOO! Oh, and: CRT's seem to be in GREAT shape. The unit powers up fine, all green diagnostic lights come on - after warm-up all the on-screen menus, convergence, etc. seem to work. The RGB input #2 works! All the cards seems to be there.
![]()
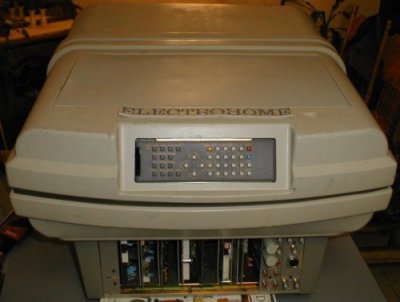
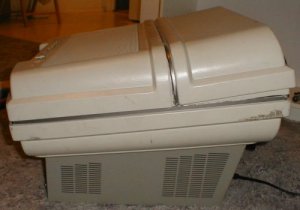
A few initial pics of the projector:
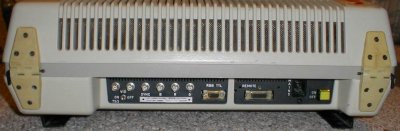
Exterior of the unit:


![]()
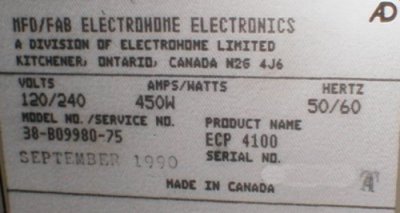
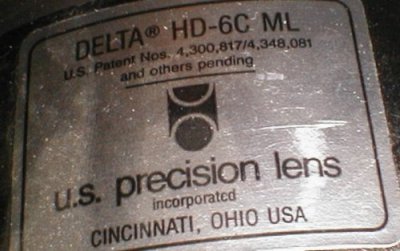
Yup, definitely an ECP 4100. 13 years old by this sticker:
![]()
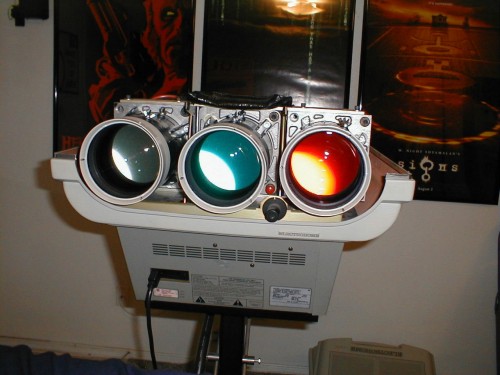
The ACON lens/motor assembly
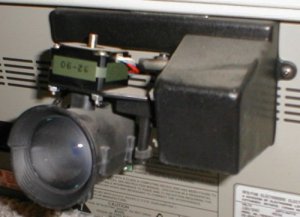
![]()
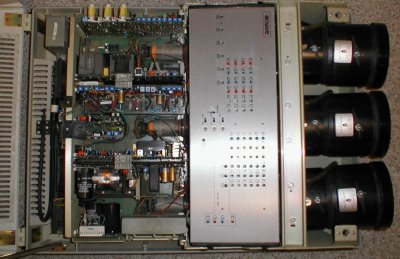
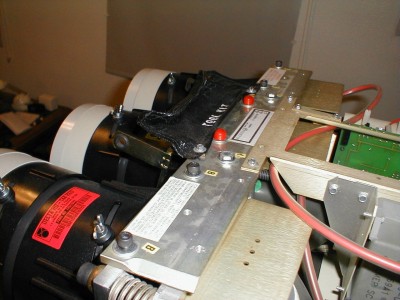
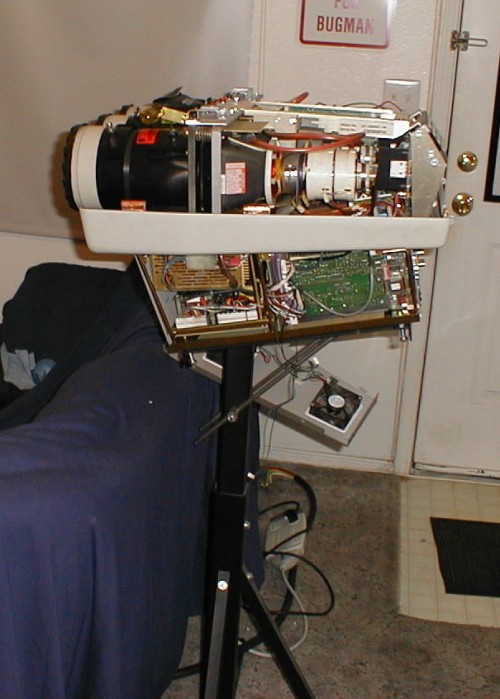
What's under the "hood":
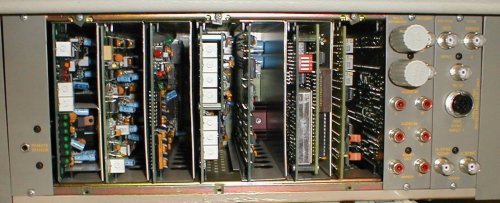
![]()
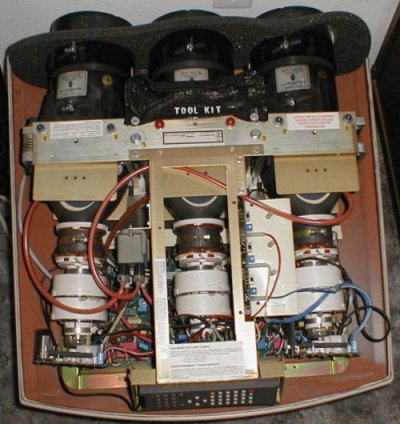
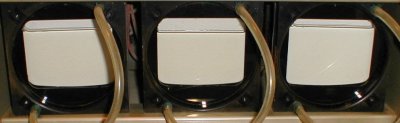
The CRT's (last pic slightly washed out...):
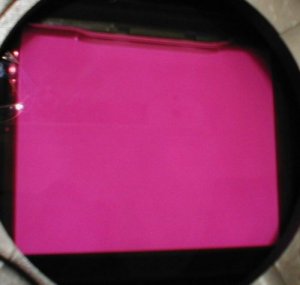
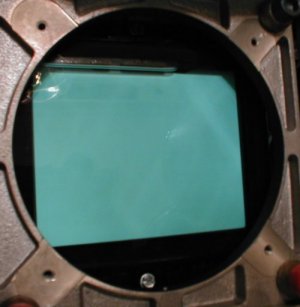
![]()
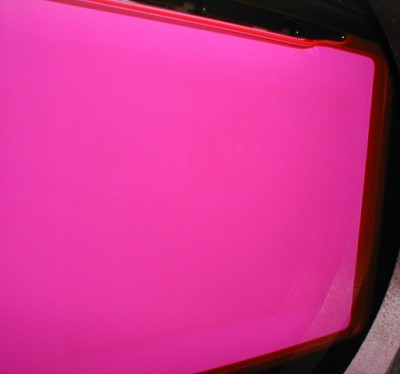
The first image projected on my wall. This is my computer desktop image - the projector wasn't fully focused/converged which is why the image isn't great.
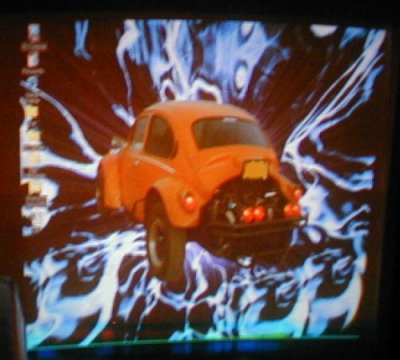
![]()
(4/17/03): I received some new parts in the past couple weeks for the projector.
This is the new dallas chip:
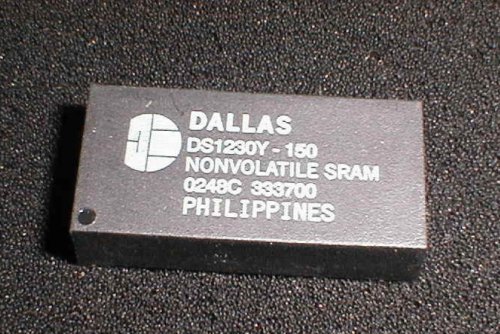
These chips have batteries built in, and are not replaceable (they last 8-10 years), and since the projector is 13 years old, I decided to go ahead and replace it. This particular chip isn't the EXACT same as what was in the projector, but they don't make the same chip anymore (this one worked fine).
![]()
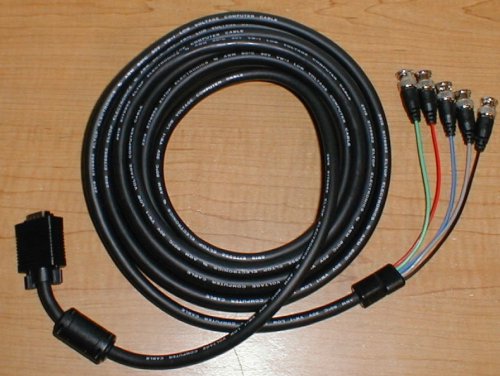
This is my new vga - 5 BNC cable. Got it cheap at PCcables.com This is what I will use to run from the transcoder to the projector.
![]()
This is my new transcoder. Got it from copperbox.com It takes the 480p signal from my DVD player and converts to RGB for the projector.
![]()
![]()
Here's a screenshot. The shadowy figure standing next to the image is me. Not too bad of a picture considering the projector is setting on my kitchen table, and I'm projecting on a gloss white textured wall (which is why the image is a little washed out). This particular image is over 6 feet wide.
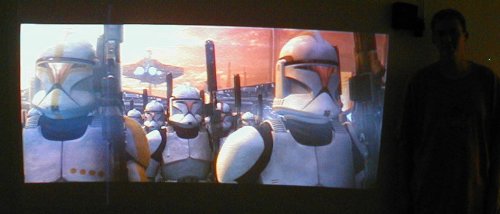
I initially had some problems with horizontal foldover, but fixed it by adjusting the h.move control. Now I have a small problem with a vertical band in the picture..... Still working on that one.
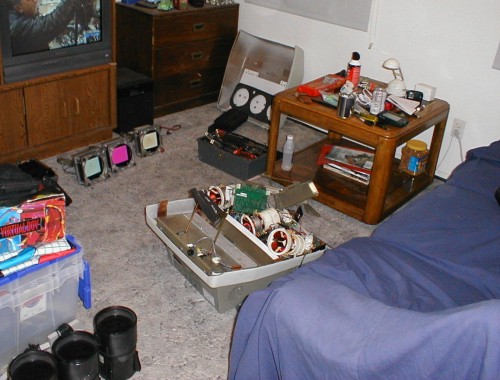
I still need to build a screen, and a projector stand.
![]()
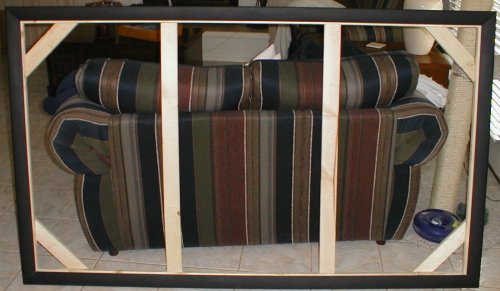
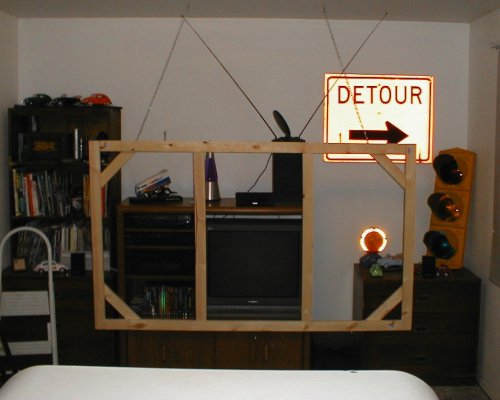
(5/12/03): Built the screen frame! Went together very easy. Its made out of "select" 1X3 pine, L & T-brackets, wood screws, and plain baseboard for the border (painted flat black). Its a 16:9 aspect ratio (72" wide X 40.5" tall). I got everything from the hardware store - now I'm just waiting on the screen fabric:
Rear view:
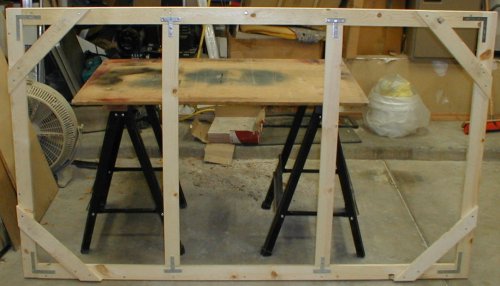
Front View:
![]()
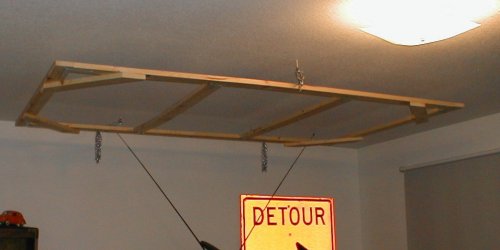
(5/18/03): Here is the screen frame mounted (folded up to the ceiling) - this isn't the most convenient screen to set up when I want to watch a movie, but considering I will be using it 1-2 times a week, its not too big of a deal. The fabric should be here in a couple days.
![]()
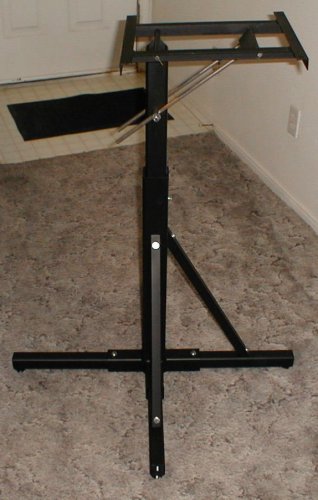
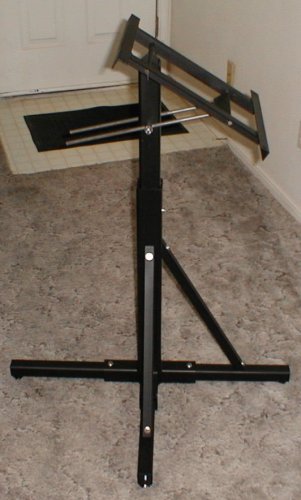
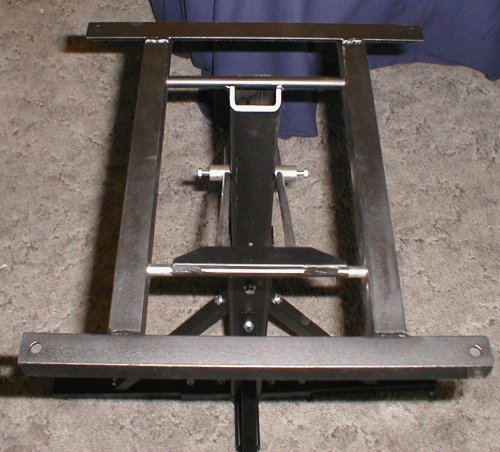
It took several days, but I finally finished the projector stand! The best way to mount these projectors is to the ceiling, however, the geometry just wouldn't work out right in my apartment. So I figured if I have to set it elevated on the floor, might as well do it right! I decided I would make it out of steel, and make it fairly heavy duty. My major constraint was that it had to break down easily so it would fit in my car. It also needed to be adjustable (+ or - 6 inches in height, and + or - 15 deg. of tilt). So after a little designing in cad, I went to a steel yard and grabbed some steel stock.
After an afternoon of cutting steel on the bandsaw, this is what I was left with - the raw material ready to be welded.
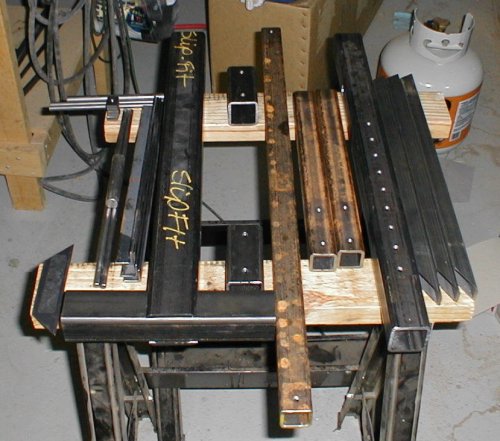
All the pieces welded and painted flat black
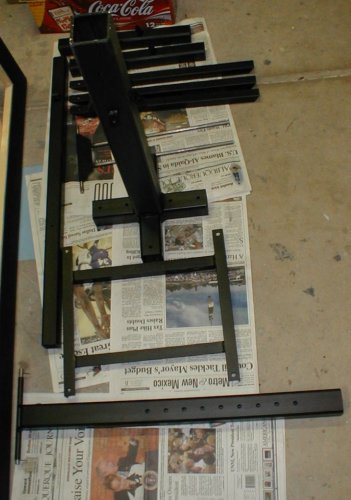
How does it work you ask? Simple - The projector gets bolted to the top 'frame' (see pic below). This frame tilts up and down via two steel rods that go through a larger diameter steel rod that has set screws in the end. It pivots on a steel rod that passes through a hollow steel tube that is welded to the vertical square tubing. You set the projector at the angle you want, and tighten the set screws and whala! To set the height of the projector, the entire upper portion slides up and down inside the larger tubing where the diagonal supports are mounted to. The left & right leg of the stand are both one piece units with diagonal supports. The front/rear leg is actually one piece that slides all the way through - since I needed the stand directly behind my couch I couldn't use a diagonal support on the front; but since the front/rear leg is a one piece design, the single diagonal support at the rear is enough to handle the load. The legs also incorporate feet that are threaded into the ends (cant really see in the pics) this enables me to set the stand perfectly level on the floor. Before I built the stand I measured its center of mass - while not an exactly perfect measurement, I was able to incorporate it in the design of the stand. You can see that the pivot point is NOT at the center of the 'frame' - the pivot point is at the center of mass of the projector which means it is close to being balanced even with the set-screws loose. This also keep the major part of the mass directly over the vertical tubing so it imparts very little moment and is thus very stable (it wont fall over easy). Its easier to "describe" how the stand works in pictures rather than words:
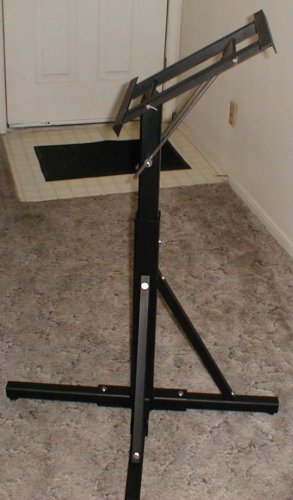
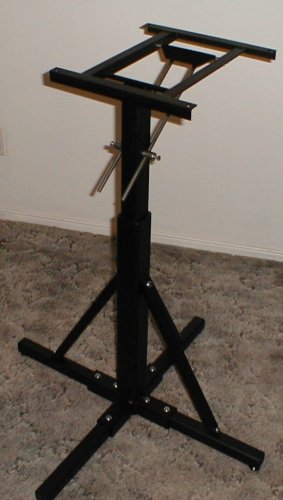
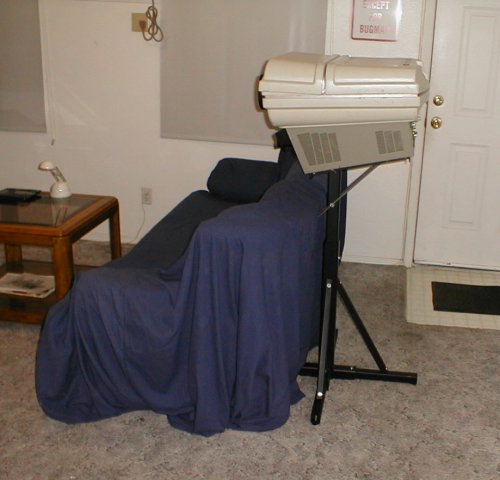
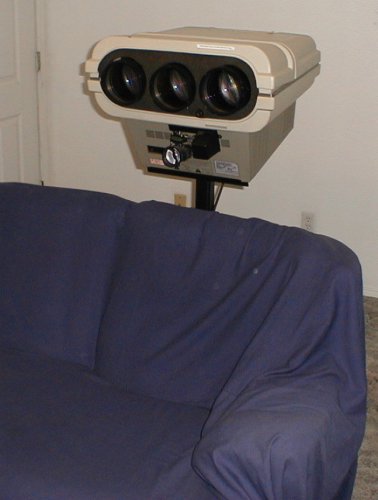
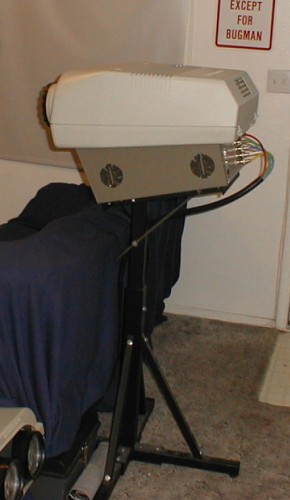
Here it is with the projector mounted.
![]()
(5/25/03): The screen material arrived and I have finished the screen completely. I have also tweaked the projector - I went through the official service manual and adjusted every last setting (minus the ones that I would need an oscilloscope for) - took all day, but was well worth it. I thought it looked great before... It looks even better now!
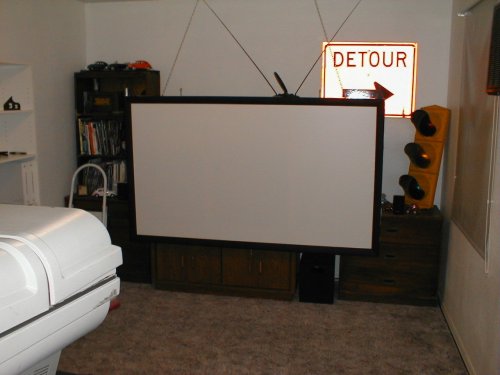
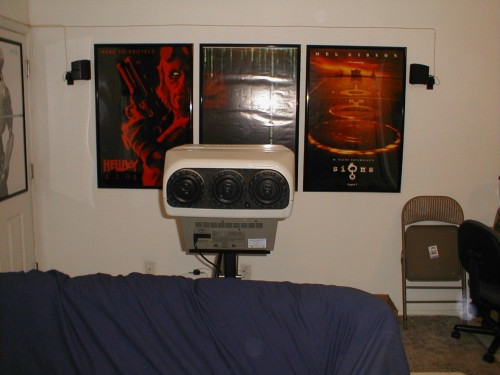
Here is the screen frame hanging exactly where I want it - you can see its relative size compared to my 27" tau tv. The dvd player, and receiver are to the left of the tv (BEHIND the screen, as is the center channel speaker) - more on this later.
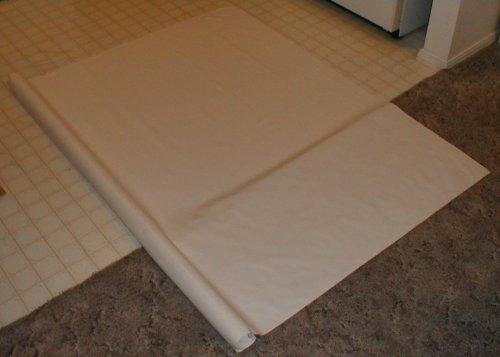
Here is the roll of screen material that I bought. Its the "front white" material from www.iweiss.com It has a gain of about 1.385 and isn't very expensive. I bought 3 yards and had it shipped rolled (its 54" wide).
After moving my coffee table out of the way, I went to work stapling the material on the frame. It would have been MUCH easier to do this with the help of another person, but I managed. At first the staples wanted to rip out, but once I got more and more of it stapled down they stopped and held the material just fine. I drove my neighbors crazy with the staplegun though and got in trouble with the landlord - almost went through an entire box of staples (~1000+ staples) - and finished at 10pm; oops. Oh well.
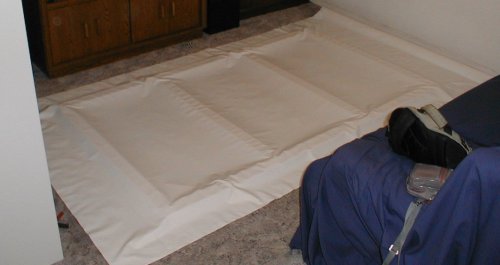
Here it is DONE! Looks really good. No wrinkles or anything - nice and flat. To answer a few questions I KNOW you have: NO, I didn't use any backing material whatsoever on the screen - it doesn't let very much light though, and I have ZERO problems with reflections off the t.v. behind it. As an added bonus, I can still control the sound level (receiver) and dvd player (which are BEHIND the screen - not the most ideal location, but it WORKS!) :-) Its a little bit of a pain to trade out DVD's, but the tradeoff is a screen that is 6 FEET WIDE! So far I haven't moved the center channel - it didn't get muffled very much, so I might try to leave it and adjust it to compensate (even though the screen material is not 'acoustically transparent'). Otherwise I will build a small stand for it so that it peeks out over the top of the screen. For the price, the screen material was well worth it. In VERY bright scenes (like the construct scene in the matrix which is almost completely white) I get a little colorshift, and slight hotspotting. But its not incredibly noticeable, and everything else looks GREAT. The other side of the material would've prevented the colorshift and hotspotting, but at the expense of the gain.
After a FULL day of setting up every aspect of the projector the image has never looked better (see screenshots below). As you can see below I still need to make the rear panel (its cheaper to make one that to buy an original).
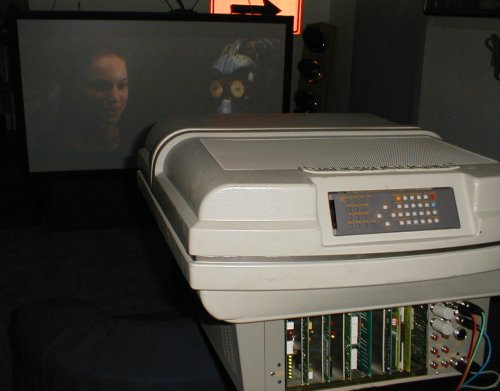
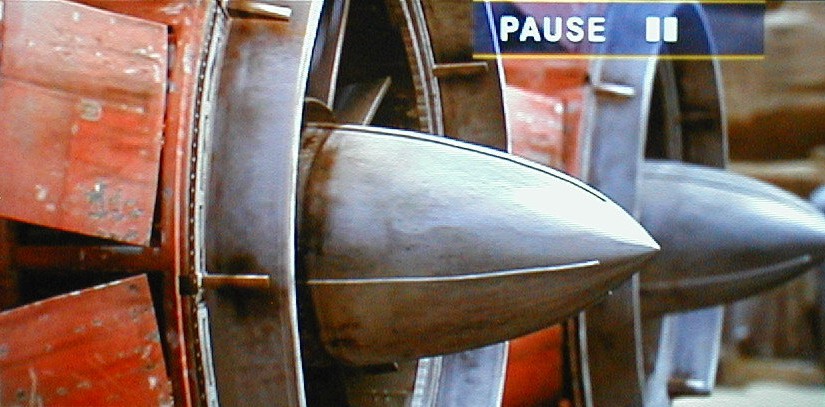
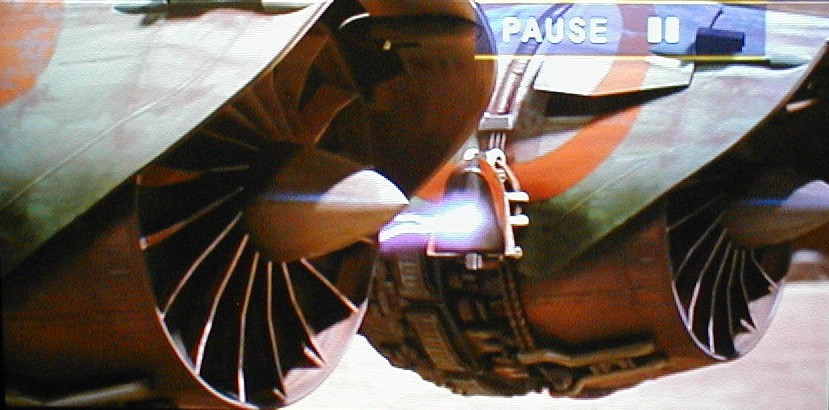
Here are the a few screenshots (from Star Wars Episode I, and The Fifth Element) after the projector had a full setup - VERY nice picture (in my opinion)!
![]()
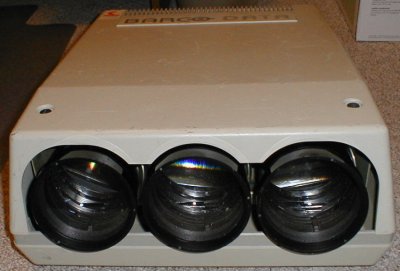
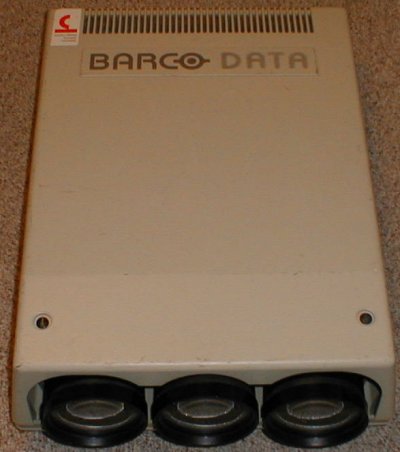
(6/29/03) - I've gone and done it..... I now own two CRT projectors! I picked up a fairly old Barco. Couldn't stand to let it go to waste, so I figured I would try to get it running if possible. At first I thought it was a data 400, but it turns out it is a data 3 rgb (built in 1985). It should *just* be able to display a 480p input signal. I figured this might make an ok backup projector. It probably would - if I can get it to WORK!
![]()
Here it is after a little cleanup work (it was quite dirty).
![]()
This projector utilizes Clinton tubes. You can see they are flawless (no burns). Probably could use a little more coolant fluid though (ethylene glycol).
![]()
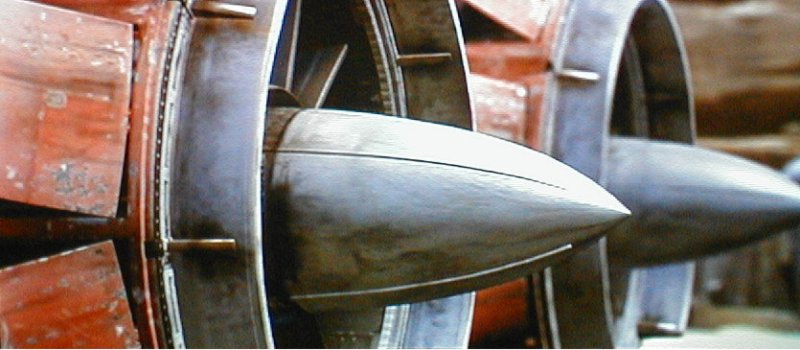
The lenses are delta II DT's. When I pulled them off, I was quite surprised at how light they were - its no surprise that they look to be mostly plastic.
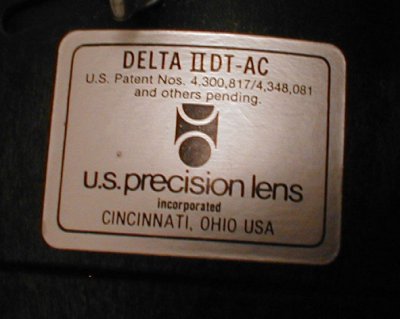
![]()
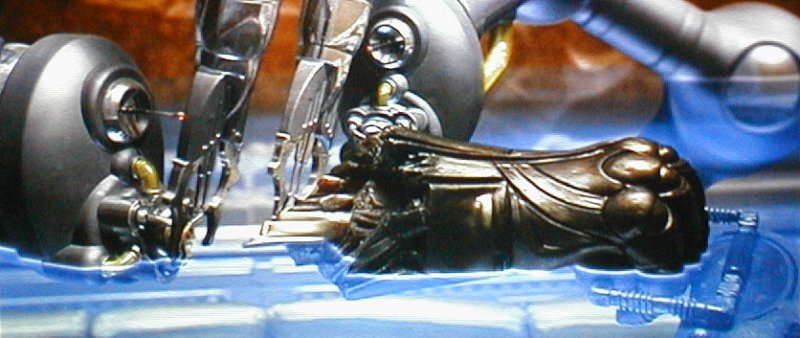
Here are its guts. Everything is there and physically looks good. I love the way the lid flips up! As you can see its an analog machine (yick), but it would still make a decent projector. I also like the little 'flex light' built into the machine.
![]()
After I cleaned it up, I plugged it in and powered it up... No image! After talking to a few people I found out you have to have the wired control box connected to the projector before it will work properly. Of course I didn't get this control box when I got the projector... I did manage to find the schematic for one, so I built it (below) - quite a simple circuit: about a dozen resistors, 7 potentiometers, a couple of switches and a DB15 connector.
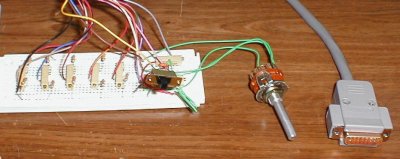
![]()
After all that, I plugged everything in and tried it again - still no picture! Bummer. When I turn it on, the HTHV light does not come on, and the scan fail light comes on. I've eliminated shorted tubes as the possible culprit (I disconnected the HV wires from the splitter and still have the same problem) - so its probably one of the boards. My best guess is its either the SMPS board, horizontal deflection board, or vertical deflection board (or all of them). I've inspected all the solder joints and reseated all the cards and that didn't help. I pulled boards one at a time and found that when I pull the north-south correction + horizontal shift board the high voltage power supply actually fires up, but it makes a funny noise (sounds like it is coming from a transformer) - and the voltage pulsates with the noise. If I pull the vertical deflection + sync module board the scan fail light doesn't come on. I highly suspect the north-south correction board has a problem, but I cant find it as of yet.
![]()
My Latest HT Pics:
I was never able to get the old Barco to work. Most of it went to the dumpster - although I do still have the tubes.
I also ended up selling the Acon unit off my ECP4100 (I never used it).
I managed to find a set of HD144's in good shape (for a great price) - so I upgraded the lenses on my ECP4100.
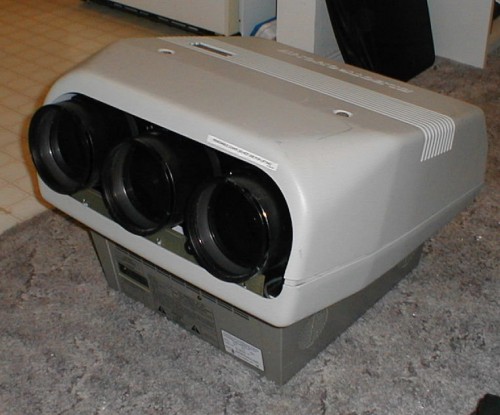
Recently I purchased an ECP4500+ on eBay (pretty good deal). I expected the tubes to be toast (they were), but I figured I could use this PJ to get rid of a few small problems my old ECP4100 was having.
![]()
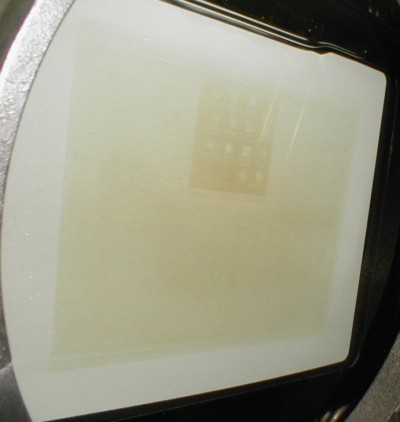
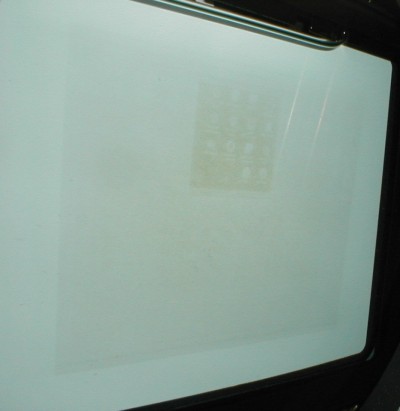
Here's what the tubes from the 4500+ looked like (blue and green were gonners, with low emission, red is still OK). These are 07MTS tubes.
![]()
What I wanted to do was get a set of like new 07MS, or 07MTS tubes to install in the 4500+, but an AFFORDABLE set never surfaced. I ended up taking the flawless SD-187's out of my ECP4100 and installing them into the 4500+.
The mess:
![]()
My HD144 lenses :-)
![]()
Getting the new ECP5400+ all set up:
![]()
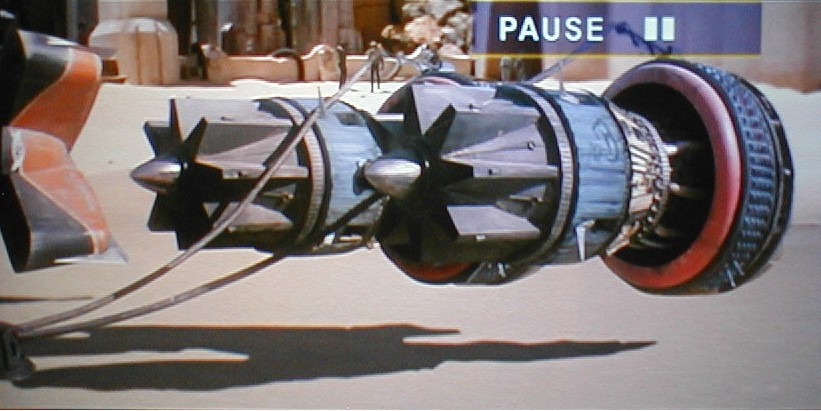
Here's a few quick screenshots from the ECP4500+ with SD187's. (Can you tell I like Star Wars?) This is at 768P from a Momitsu DVD player. Pic quality is GREAT. Probably would be a little better with 07MS's, but oh well.
![]()
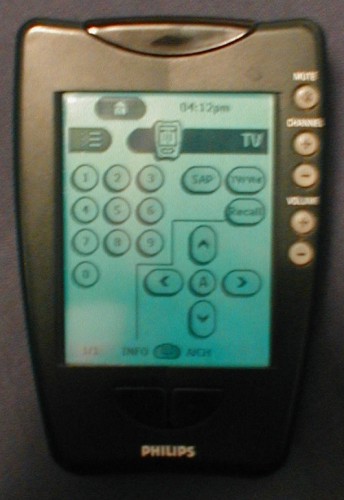
I guess I never mentioned that I control everything with an older Pronto TS1000:
![]()
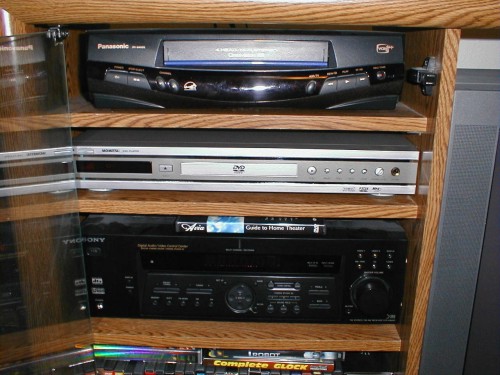
Here's my Momitsu DVD player (middle). I run it at 768P to my ECP4500+.
![]()
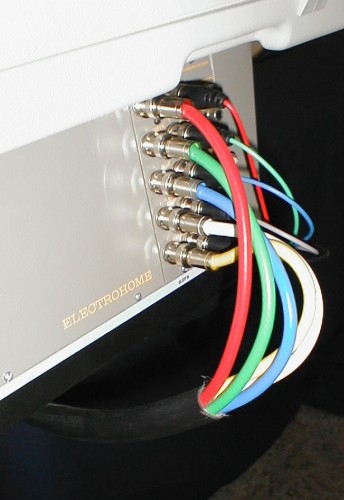
I also upgraded the cables I was using (old cables on the right, new cables on the left). I custom made a set for the Momitsu. They are Canare RG6 with compression fit 75-Ohm BNC ends - the whole bundle is over an inch thick!
![]()
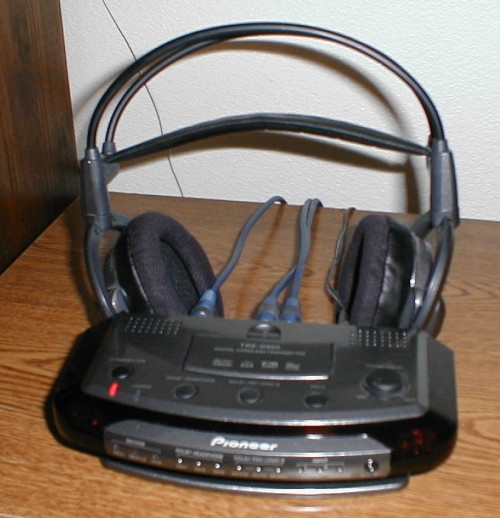
And for late night movie watching I had to get a set of headphones (neighbors complained). So I got these Pioneer infrared Surround Sound units. They work VERY well.
![]()
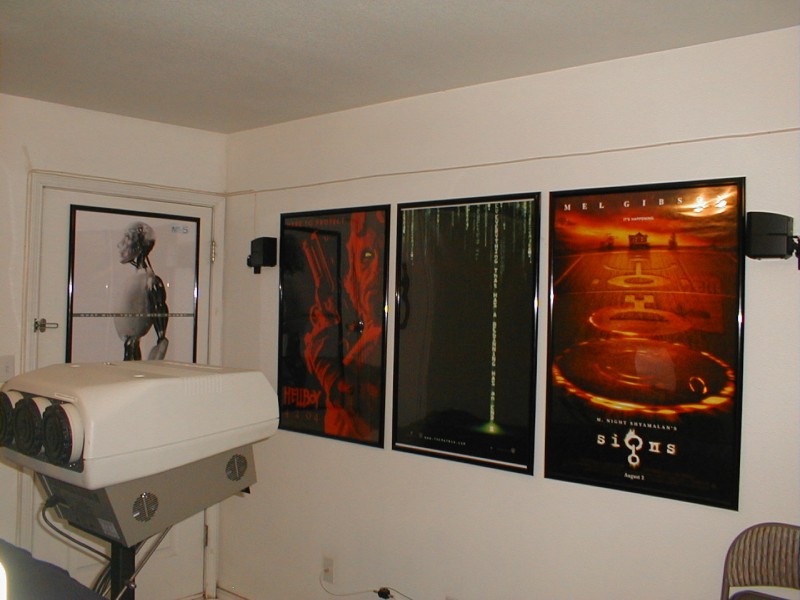
My movie posters:
![]()